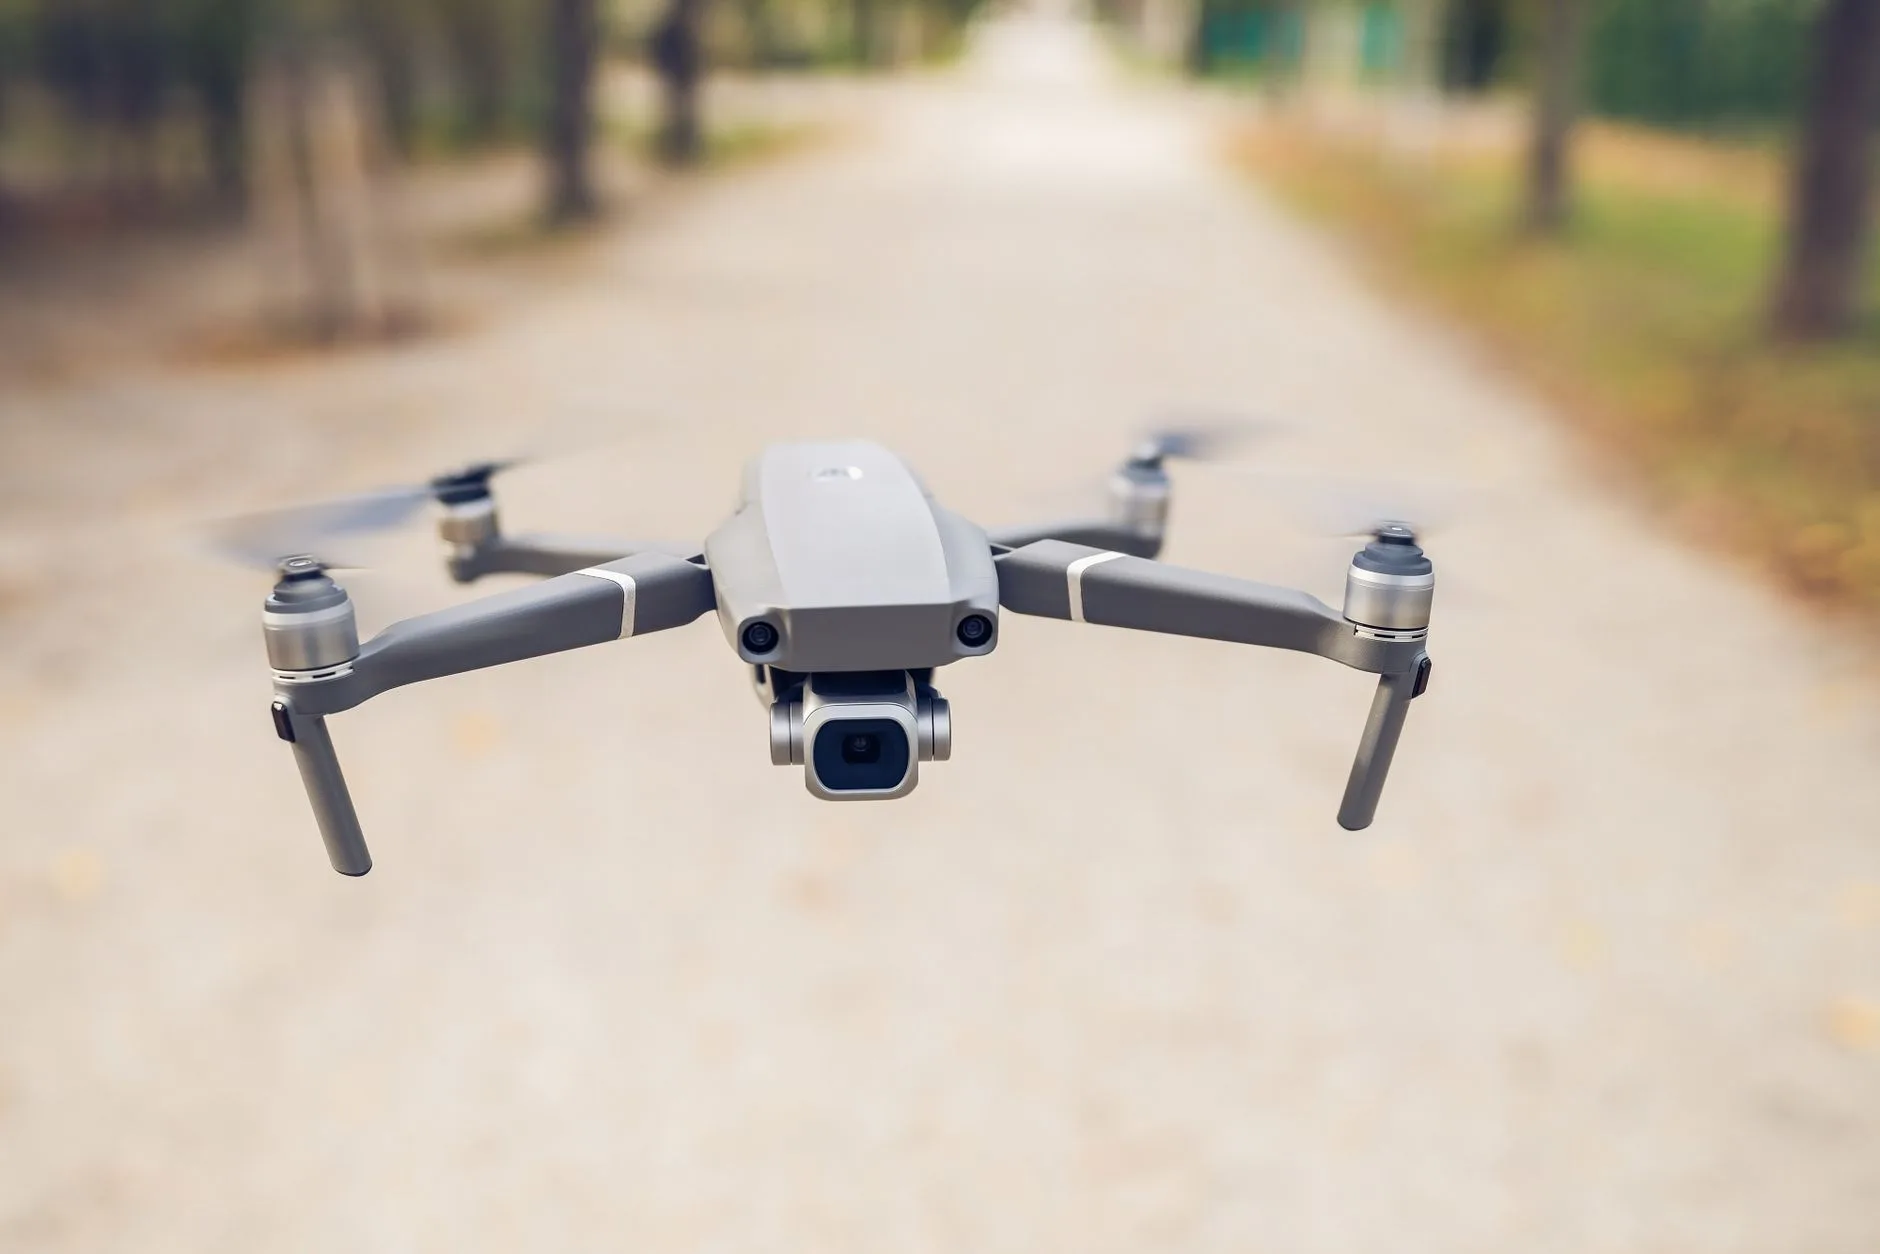
Cheapest Thermal Drone Guide: Turnkey Systems vs. OEM Payload Integration
Cheapest Thermal Drone Guide: Turnkey Systems vs. OEM Payload Integration
If you’ve spent any time hunting for the cheapest thermal drone, you’ve probably run into a frustrating engineering wall. On one side, turnkey enterprise rigs from the big commercial manufacturers cost between $4,000 and $12,000. Look closely at those invoices, and you’ll find the price isn’t driven by raw sensor physics. It’s bloated by proprietary multi-sensor gimbals, walled-garden software ecosystems, mandatory support contracts, and hefty radiometry licensing fees. On the other side, sub-$500 “thermal” drones sold across consumer marketplaces are mostly toys relying on software-interpolated micro-sensors or cheap night-vision filters that turn into blurry, useless noise at standard flight altitudes between 30 and 120 meters above ground level (AGL).
Here’s the deal for UAV payload engineers, aerial inspection operators, robotics startups, and procurement leads: the real sweet spot for a cost-effective, high-performance thermal rig is modular payload integration. When you mate an off-the-shelf commercial airframe or custom long-range quad with an ultra-lightweight (<15 g to 35 g), low-power (<1.2 W) 640×512 uncooled Long-Wave Infrared (LWIR) OEM core, you get a full-spec, 50 Hz aerial thermal imaging system at a fraction of commercial retail pricing.
Table of Contents
- 👉 1. Cost Breakdown: Turnkey Enterprise vs. DIY OEM Payloads
- 👉 2. Core Physics & SWaP-C Requirements for UAV Thermal Imaging
- 👉 3. Payload Engineering: Integrating Low-Cost LWIR Modules onto UAV Platforms
- 👉 4. Hardware Benchmark: Low-SWaP 640×512 LWIR OEM Modules for Drones
- 👉 5. Step-by-Step Integration Guide: Assembling a Sub-$1,500 640×512 Thermal Drone
- 👉 6. Industrial Deployment & Sourcing Best Practices
- 👉 7. Frequently Asked Questions (FAQ)
1. Cost Breakdown: Turnkey Enterprise vs. DIY OEM Payloads
When you sit down to run the numbers on an aerial thermal setup, you have to separate retail packaging from actual microbolometer silicon. The drone market is wildly polarized right now, leading to absurd price gaps for identical sensor resolutions.
The $4,000–$12,000 Commercial Markup
In standard off-the-shelf industrial thermal aircraft, the invoice reflects far more than the actual sensor core. Turnkey enterprise setups bundle closed-source 3-axis brushless gimbals designed specifically for locked payloads, proprietary flight controller firmware, locked ground control stations (GCS), and recurring cloud telemetry subscriptions. On top of that, manufacturers bake in heavy dealer markups and institutional enterprise service agreements. In these ready-to-fly platforms, the actual uncooled 640×512 or 384×288 LWIR core represents only 15% to 25% of the total price tag.
The Sub-$500 “Toy” Trap
Take a look at budget marketplaces, and you’ll find plenty of drones claiming “thermal imaging” or “infrared night vision” for $150 to $500. Tear those down on the bench, and you’ll run into one of two dead ends:
- ⚙️ Infrared-Cut Filter Stripping on Visible CMOS Sensors: These cameras simply remove the 650 nm IR cut filter and turn on an 850 nm or 940 nm Near-Infrared (NIR) LED. They only pick up reflected light up to 3 to 5 meters away. They cannot detect long-wave thermal emissions in the 8–14 μm band, making them completely blind to true heat loss, insulation voids, or human body signatures in pitch darkness.
- ⚙️ Low-Resolution Micro-Sensors (e.g., 32×24 or 80×60): These rigs drop in rock-bottom microbolometers and rely on aggressive software interpolation to scale the output to a 1080p stream. At a flight altitude of 50 meters, an 80×60 sensor yields an Instantaneous Field of View (IFOV) covering several meters per pixel. The result is total pixel soup—useless for finding utility hot spots, tracking missing persons, or spotting wildfire perimeter flare-ups.
The OEM Payload Sweet Spot ($600–$1,800 BOM)
In the shop, building your own payload around a dedicated OEM uncooled LWIR core is the most practical move. By combining an open-architecture airframe (like an ArduPilot/PX4 quad or an industrial-grade FPV frame) with a standalone 640×512 12 μm OEM thermal module, you get genuine high-resolution thermal imaging while keeping total hardware costs under $1,500.
Here is what a field-proven Bill of Materials (BOM) looks like:
- ⚙️ 640×512 12 μm LWIR OEM Core: $600 – $950
- ⚙️ 7-inch to 10-inch Long-Range Carbon Fiber Airframe: $120 – $220
- ⚙️ F7/H7 Flight Controller + 4-in-1 50A+ ESC Stack: $80 – $140
- ⚙️ 5.8 GHz High-Power Analog or HD Video Transmitter (VTx): $45 – $160
- ⚙️ Micro 2-Axis Stabilization Gimbal or Custom TPU Damping Mount: $60 – $120
- ⚙️ 6S LiPo / Li-Ion High-Capacity Battery Pack: $50 – $90
- ⚙️ Regulated 5V BEC, LC Power Filters, and Shielded Wiring: $15 – $30
That brings your total system BOM to roughly $970 – $1,710. By building modular, you get direct access to raw thermal video, handle serial communication via standard UART or USB, and skip recurring subscription fees entirely. You can explore more architectural integration strategies in our industrial and outdoor monitoring knowledge base.
2. Core Physics & SWaP-C Requirements for UAV Thermal Imaging
To pick the right thermal core, you need to understand how microbolometer physics, optical geometry, and Size, Weight, Power, and Cost (SWaP-C) trade-offs play out in the air.
Pixel Pitch (12 μm vs. 17 μm) & Native Resolution
The industry has shifted from legacy 17 μm Vanadium Oxide (VOx) focal plane arrays to 12 μm fabrication. For an airborne payload, that 12 μm pitch delivers two clear practical advantages:
- Smaller Sensor Footprint: A 640×512 array with a 12 μm pixel pitch has an active detector diagonal of roughly 9.83 mm, compared to 13.92 mm on an older 17 μm core.
- Lighter, More Compact Optics: A 12 μm detector hits the same spatial resolution (tighter IFOV) using a shorter, lighter lens. Because Germanium and Chalcogenide glass make up most of an infrared lens’s weight and cost, a 12 μm core slashes both the payload mass and the optical bill of materials needed for long-range target detection.
Thermal Sensitivity (NETD) & Atmospheric Transmission (8–14 μm)
Noise Equivalent Temperature Difference (NETD) measures the sensitivity of the microbolometer—specifically, the temperature delta needed to produce a signal-to-noise ratio of 1. It is measured in millikelvins (mK), where lower numbers mean cleaner image contrast.
Cores rated at ≤40 mK to ≤50 mK are the gold standard for aerial utility work. Up in the air, thermal contrast is often compressed (like scanning for a lost hiker against a flat 15°C tree canopy or checking cooling solar panels at dusk). A sensitive sensor pulls crisp thermal definition out of fractional-degree shifts, while a noisy sensor delivers muddy gray frames. Operating in the 8–14 μm LWIR band allows the sensor to punch straight through atmospheric moisture, smoke, and light fog far better than visible or Short-Wave Infrared (SWIR) sensors.
Framerate Economics: 50 Hz vs. 9 Hz Aerial Refresh
Due to export compliance regulations, thermal cores are split into ≤9 Hz versions and standard 25 Hz / 50 Hz versions:
- ⚙️ 9 Hz Thermal Modules: They clear export paperwork with fewer hurdles, but 9 Hz creates brutal frame latency during flight. At a typical cruise speed of 15 m/s, your drone covers 1.67 meters between frame refreshes. That lag makes low-altitude manual flying, object tracking, and obstacle avoidance dangerous.
- ✅ 25 Hz / 50 Hz Thermal Modules: A 50 Hz refresh rate delivers smooth, real-time video essential for fast scanning sweeps, windy hover stabilization, and clean edge computer vision tracking without ghosting or dropped frames.
Optics Selection & DRI (Detection, Recognition, Identification) Modeling
We evaluate thermal optics using standard Johnson Criteria: Detection (1.5 pixels across target critical dimension), Recognition (6 pixels across target), and Identification (12 pixels across target). The Instantaneous Field of View is calculated from pixel pitch ($p$) and focal length ($f$):
$$\text{IFOV} = \frac{p}{f}$$
For a 12 μm ($0.012\text{ mm}$) core running a 9.1 mm lens:
$$\text{IFOV} = \frac{0.012\text{ mm}}{9.1\text{ mm}} \approx 1.3187\text{ mrad}$$
At an altitude of $H = 100\text{ meters}$, your Ground Sample Distance (GSD) per pixel is:
$$\text{GSD} = H \times \text{IFOV} = 100\text{ m} \times 0.0013187 \approx 0.132\text{ m} \ (13.2\text{ cm/pixel})$$
A standing human target (critical dimension $\approx 0.75\text{ m}$) covers about 5.68 pixels on the sensor plane from 100 meters up, putting you right in the sweet spot for target recognition.
3. Payload Engineering: Integrating Low-Cost LWIR Modules onto UAV Platforms
Getting an uncooled OEM thermal sensor cleanly integrated onto an airframe requires solid bench practices across power filtering, video routing, and serial control.
Electrical Architecture & Power Rail Filtering (5 V Rails)
Microbolometer focal plane arrays hate dirty power. Brushless DC (BLDC) motors and Electronic Speed Controllers (ESCs) dump massive high-frequency voltage ripple onto the main bus. Modules like the HR21-L612-USB need a clean $5\text{ V} \pm 0.5\text{ V}$ input drawing under 1.2 W.
Never power your thermal sensor directly off the raw flight battery. Take your 4S–6S pack voltage (14.8 V to 25.2 V) and step it down through a dedicated Low-Dropout (LDO) linear regulator or a high-efficiency switching Battery Eliminator Circuit (BEC) backed by an LC filter (a $470\ \mu\text{F}$ low-ESR capacitor paired with a ferrite choke). Ground loops are another common trap: tie your video transmitter ground and thermal core ground to a central star point to keep horizontal hum bars off your screen.
Video Pipeline: CVBS Analog vs. USB Digital vs. DVP/BT.656
Pick your video routing based on your processing needs and weight budget:
- ⚙️ CVBS Analog Video: Delivers ultra-low latency (<30 ms) with zero onboard compute requirements. The analog signal runs straight to a 5.8 GHz video transmitter, putting real-time 50 Hz video onto your ground station monitor instantly.
- ⚙️ USB Digital Video (UVC): Streams class-compliant digital video over USB 2.0. This is the way to go when feeding a companion computer (like a Raspberry Pi CM4 or NVIDIA Jetson Orin Nano) for onboard recording, digital mesh streaming, or edge vision processing.
- ⚙️ Parallel DVP / BT.656 / LVCMOS: Delivers raw digital pixel feeds directly to custom FPGA boards or high-end autopilots, skipping USB encapsulation latency entirely.
Flight Controller Telemetry & Gimbal Balancing
Using serial control (UART, RS-422, or USB Virtual COM Port), you can manage the core directly from your ground station. Open-source flight software like ArduPilot or PX4 allows you to map RC transmitter switches to serial strings, letting you trigger Non-Uniformity Correction (NUC) shutter calibration, digital zoom, and palette toggles (White Hot, Black Hot, Iron Red) on the fly.
Because modern OEM thermal cores weigh under 15 g to 35 g, rotational inertia is tiny. You can run sub-micro 2-axis brushless gimbals or simple 3D-printed vibration mounts, saving weight and extending battery flight time.
Edge Acceleration & Computer Vision Frameworks
If you’re pairing a digital thermal sensor with an onboard companion board for automated target detection or search-and-rescue sweeps, take advantage of hardware-accelerated vision pipelines. Developers can use the Khronos OpenVX standard to build efficient vision graphs that process 14-bit raw radiometric data or 8-bit YUV streams with minimal CPU overhead, enabling fast edge detection directly on the airframe.
4. Hardware Benchmark: Low-SWaP 640×512 LWIR OEM Modules for Drones
Here is an engineering benchmark comparing two low-SWaP 640×512 OEM thermal imaging cores designed for lightweight UAV payload integration.
| Specification Parameter | HR21-L612-USB Module | Mini 640 Uncooled Module | Industry Reference (FLIR Boson Plus OEM) |
|---|---|---|---|
| Detector Architecture | Vanadium Oxide (VOx) Uncooled FPA | Uncooled VOx FPA, WLP Package | Uncooled VOx Microbolometer |
| Array Resolution | 640 × 512 | 640 × 512 | 640 × 512 |
| Pixel Pitch | 12 μm | 12 μm | 12 μm |
| Detector Frame Rate | 50 Hz | 25 Hz / 50 Hz (version dependent) | 60 Hz / 30 Hz |
| Spectral Range | 8 – 14 μm (LWIR) | 8 – 14 μm (LWIR) | 8 – 14 μm (LWIR) |
| Thermal Sensitivity (NETD) | ≤40 mK @ 25°C, F#1.0 | <50 mK @ 25°C, F/1.0 (<40 mK select) | ≤20 mK @ F#1.0 |
| Typical Power Consumption | <1.2 W (including expansion board) | ~0.60 W (typical base core) | ~1.4 W |
| Supply Voltage | 5 V ± 0.5 V | 1.8 V / 3.3 V / 5 V rails | 3.3 V / 5 V |
| Video Interface | USB Digital (CVBS config-dependent) | PAL/NTSC, BT.656, LVCMOS, DVP | USB 3.0, CMOS, or MIPI |
| Control Interface | USB Serial Port, 1 × RS-422 | UART / I2C / RS-232 | UART, I2C, USB |
| Module Weight | <15 g (Ultra-lightweight) | ~18 g – 35 g (lens dependent) | ~34 g (with lens) |
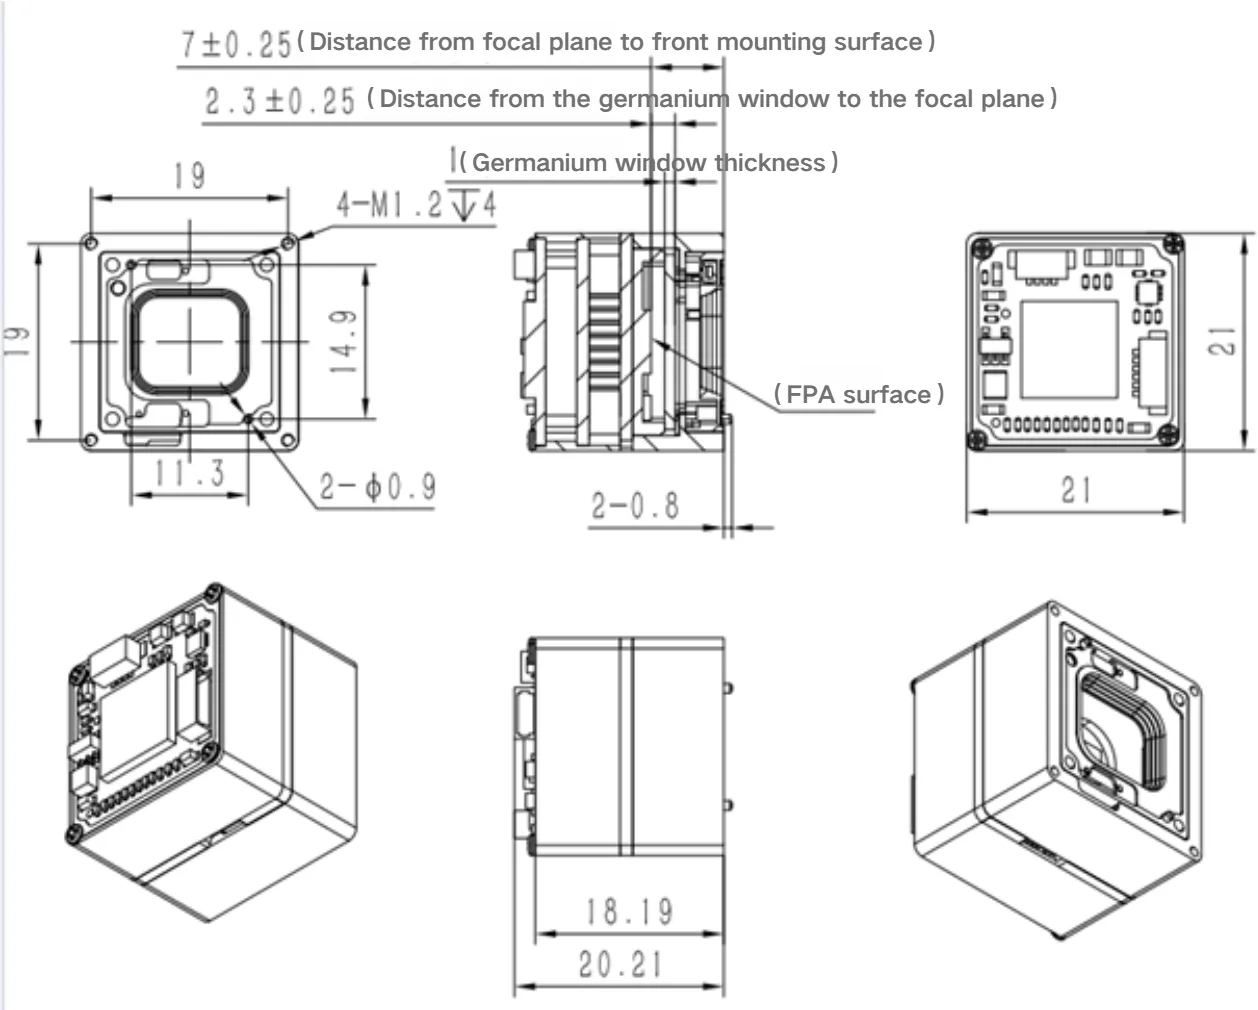
| Dimensions (W × H × D) | 21 mm × 21 mm × 20.2 mm | Compact OEM Core (Lens dependent) | 21 mm × 21 mm × 11 mm (core) |
| Operating Temperature | -40°C to +85°C | -40°C to +80°C | -40°C to +80°C |
| Mechanical Shock & Vibration | 80g @ 4ms; 6.06g random vibration | Standard Industrial Shock & Vib | High Shock / Mil-Spec Grade |
HR21-L612-USB 640×512 LWIR Module Showcase
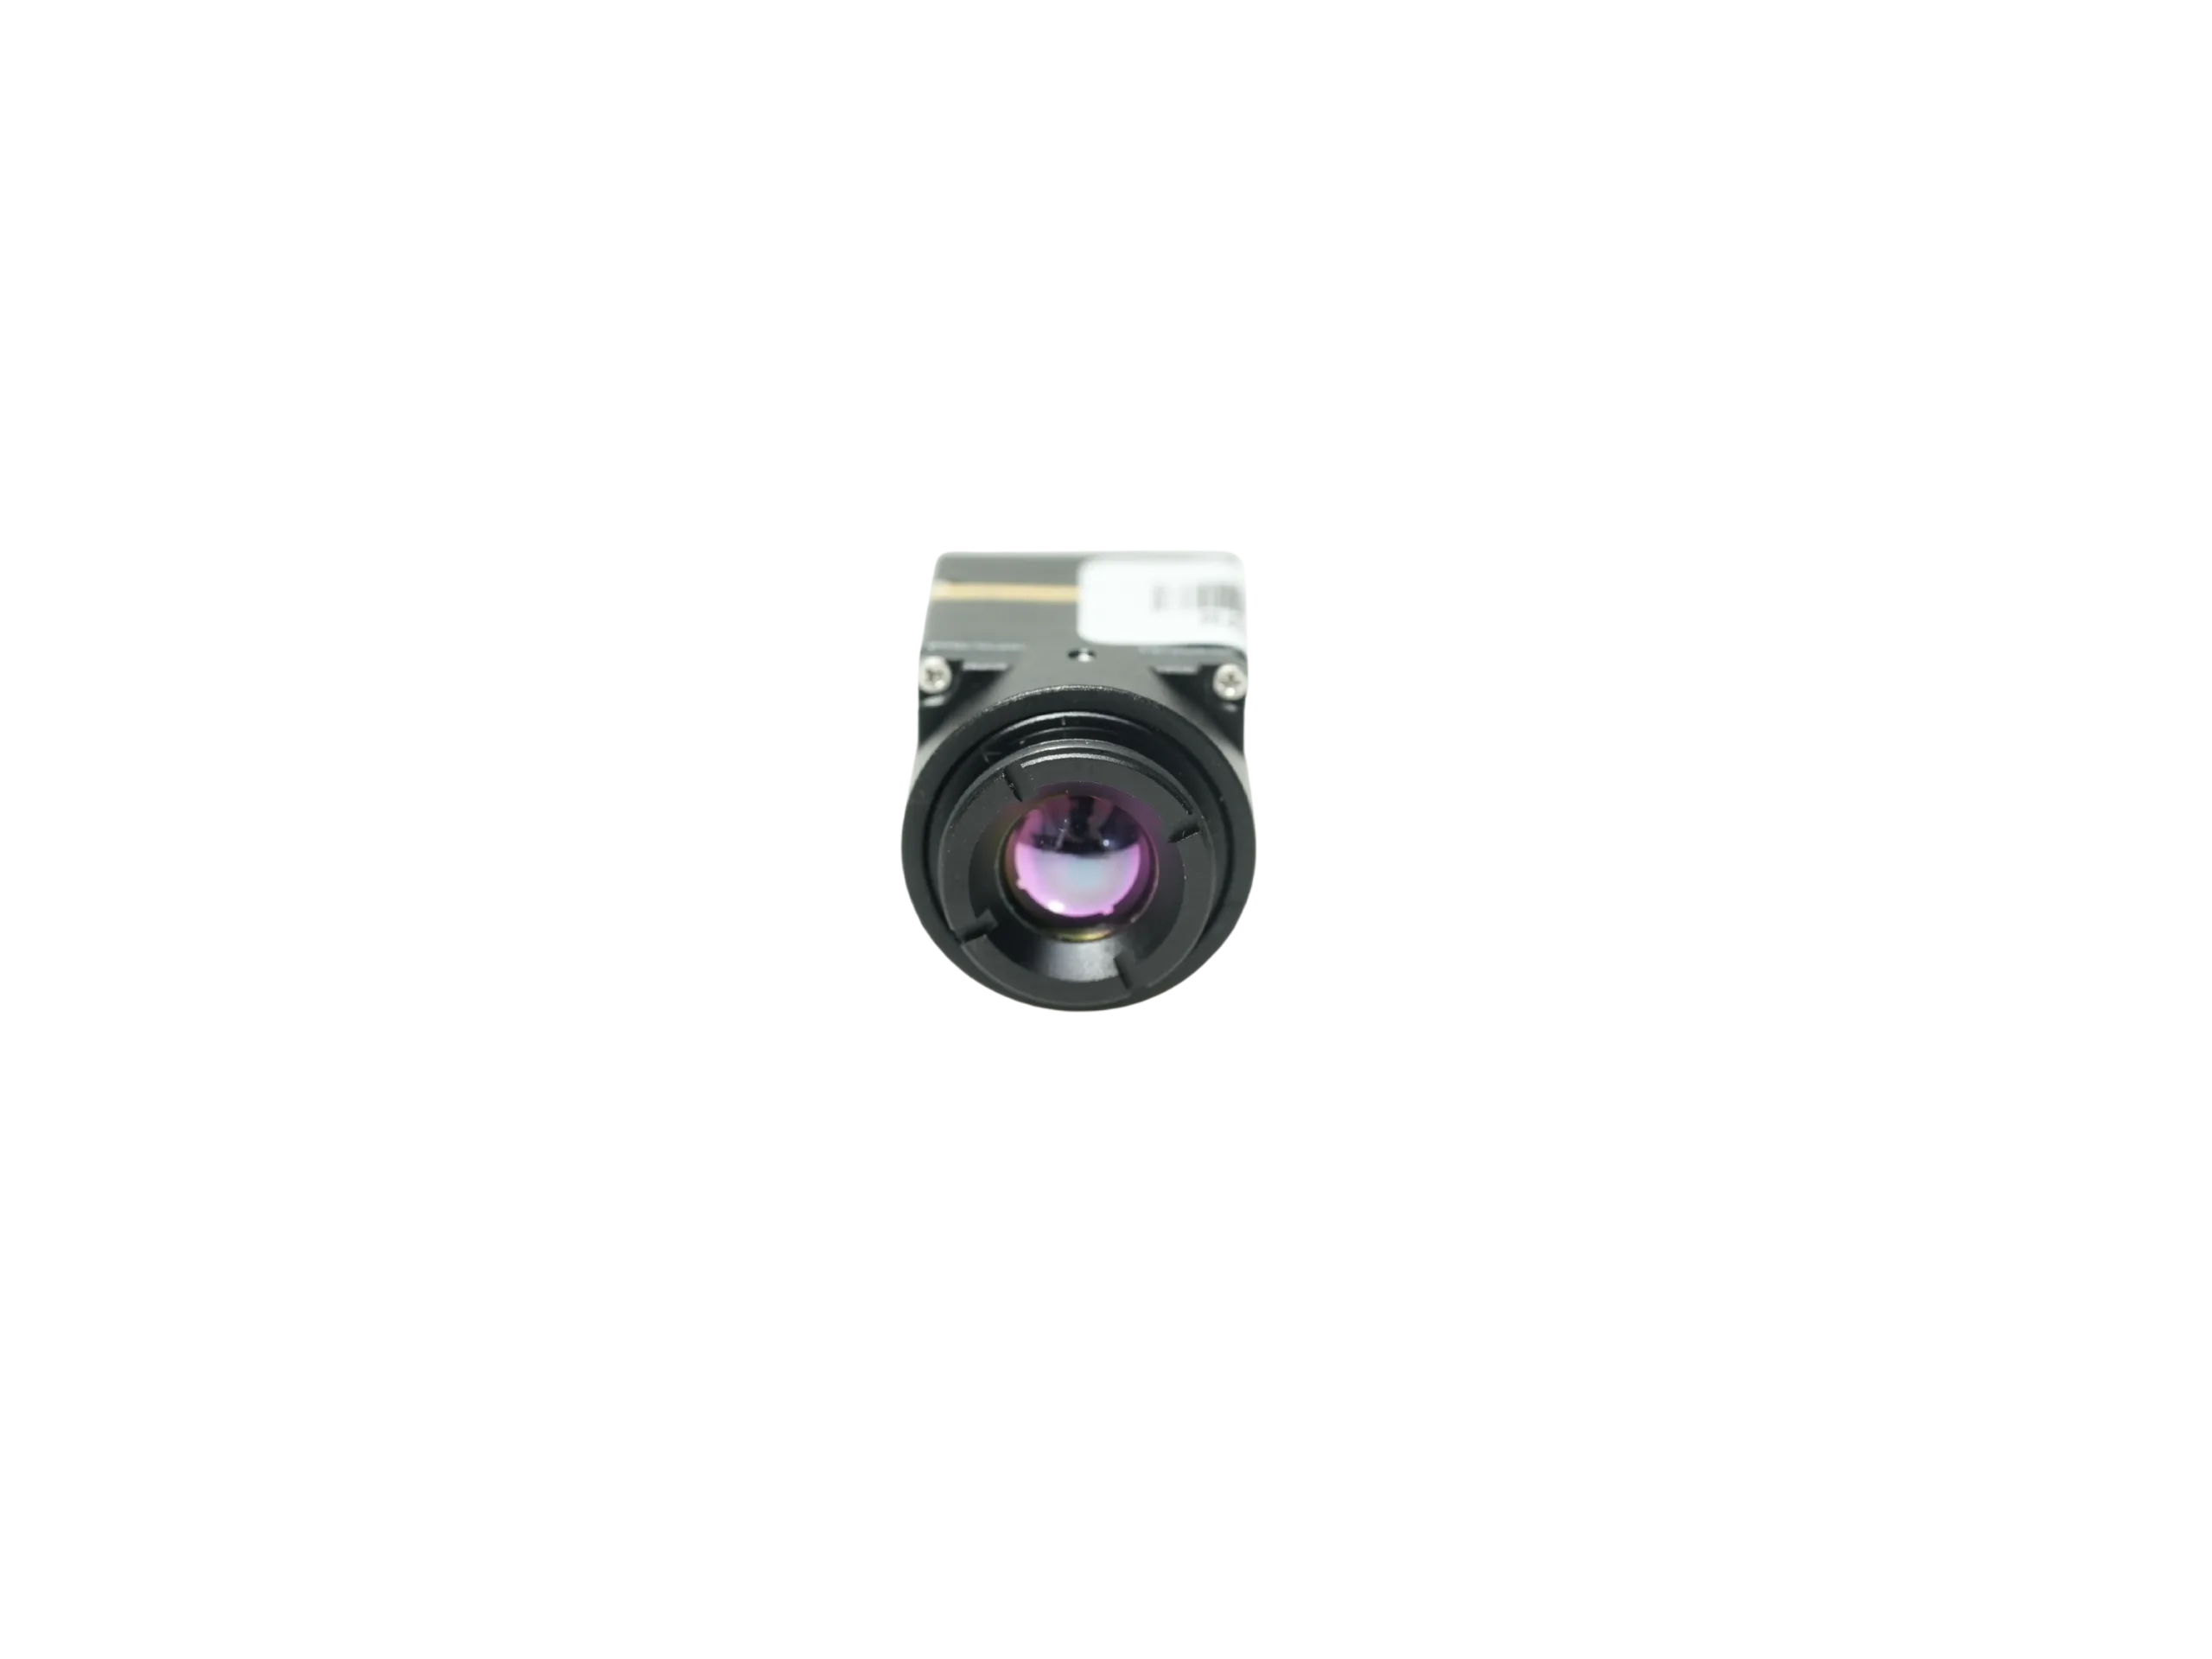
The HR21-L612-USB Uncooled LWIR Thermal Module is an ultra-compact VOx infrared core engineered specifically for drone payloads, industrial robotics, and tight OEM enclosures. It keeps payload mass down while making electrical wiring painless.
Key Technical Highlights of the HR21-L612-USB:
- ✅ Native Resolution & Pitch: Full 640 × 512 resolution at 12 μm pixel pitch, covering the 8–14 μm spectrum.
- ✅ Frame Rate & Sensitivity: Smooth 50 Hz refresh rate paired with an NETD of ≤40 mK @ 25°C, F#1.0.
- ✅ Ultra-Low SWaP Profile: Module mass sits under 15 g with chassis dimensions of 21 mm × 21 mm × 20.2 mm and power draw under 1.2 W on a 5 V rail.
- ✅ Flexible Video Output: Direct digital video over USB, with CVBS analog output support available on select hardware configurations (verify during RFQ).
- ✅ Onboard Image Processing: 0–10 selectable levels for brightness, contrast, and enhancement. Includes Non-Uniformity Correction (NUC), Digital Detail Enhancement (DDE), 3D noise reduction, and multiple color palettes (White Hot, Black Hot, Iron Red, Rainbow).
- ✅ Field-Grade Durability: Rated for operation from -40°C to +85°C, 6.06 g random vibration tolerance, and 80 g @ 4 ms mechanical shock rating.
If you’re building a drone where every single gram translates directly into flight minutes, this core is an easy pick. At under 15 grams with native USB and RS-422 interfaces, it mounts straight to micro-gimbals or companion processors without heavy breakout hardware.
View Product Details & Pricing ➔
Mini 640 Uncooled LWIR Thermal Imaging Module Showcase
The Mini 640 Uncooled LWIR Thermal Module provides system integrators with extensive optical flexibility for aerial inspection setups, handheld instruments, and embedded vision systems.
Key Technical Highlights of the Mini 640:
- ✅ Detector Core: Uncooled VOx array in a Wafer-Level Package (WLP) delivering 640 × 512 resolution with a 12 μm pitch (8–14 μm LWIR).
- ✅ Refresh & Sensitivity: 25 Hz / 50 Hz versions available with reference NETD <50 mK @ 25°C, F/1.0 (<40 mK available on select builds).
- ✅ Broad Lens Options: Optical configurations include 4 mm, 7 mm, 9.1 mm, 13 mm, 15 mm, 18 mm, 25 mm, 35 mm, 50 mm, 60 mm, and 75 mm focal lengths. The 9.1 mm configuration is in stock (delivering a 45.8° H × 37.3° V field of view).
- ✅ Power Efficiency: Base core draws roughly ~0.60 W across 1.8 V / 3.3 V / 5 V power rails.
- ✅ Interface Variety: Supports PAL/NTSC analog, BT.656, LVCMOS, and DVP video feeds; serial control options include UART, I2C, and RS-232.
- ✅ Operating Temperature: Full industrial operational rating spanning -40°C to +80°C.
The Mini 640 is ideal for engineering teams that need custom focal lengths or rock-bottom power consumption. The in-stock 9.1 mm optic provides a wide 45.8° horizontal field of view, making it a natural fit for wide-area agricultural mapping and search-and-rescue sweeps.
View Product Details & Pricing ➔
5. Step-by-Step Integration Guide: Assembling a Sub-$1,500 640×512 Thermal Drone
Here is the shop-tested procedure for building a clean, low-latency 640×512 thermal payload for under $1,500.
Step 1: Mechanical Isolation and Airframe Mounting
To keep high-frequency motor vibrations from introducing microbolometer sensor artifacts, 3D-print a dedicated bracket using 95A durometer Thermoplastic Polyurethane (TPU). Bolt the <15 g HR21-L612-USB core to the mount using M2 screws. Make sure your screw engagement inside the housing does not exceed 2.5 mm to protect the internal PCB traces. Mount the assembly right along the airframe’s center of gravity (CG) to keep motor load balanced.
Step 2: Clean Power Supply Assembly
Thermal sensors are sensitive to switching noise. Pull your power leads from the main Power Distribution Board (PDB) or flight battery (4S–6S). Wire in a dedicated switching BEC set to a clean 5.0 V output (rated for at least 2 A continuous). Solder a 35 V, 470 μF low-ESR electrolytic capacitor across the BEC input, and wrap the 5 V output wire through a toroidal ferrite choke to kill high-frequency ESC switching noise.
Step 3: Video Signal Wiring (CVBS / FPV Link)
For zero-latency analog piloting, solder the CVBS analog video lead from the camera harness directly to the Video-In pad on your 5.8 GHz video transmitter (or your flight controller’s OSD chip). Run the camera ground wire directly to the video transmitter’s ground pad. Shared ground references prevent ugly ground loop hum bars across your thermal feed.
Step 4: Serial Control and Telemetry Setup
Hook up the module’s RS-422 or UART TX/RX lines to a spare UART port on your flight controller. Set up your flight firmware (ArduPilot or Betaflight) to communicate over that port, and map a three-position switch on your radio transmitter to trigger Non-Uniformity Correction (NUC) shutter calibration and cycle through color palettes (White Hot, Black Hot, Iron Red) during flight.
Step 5: Pre-Flight Optical Calibration & NUC Tuning
Power the drone on the bench and verify the 50 Hz live feed on your ground station. Set your optical focus at infinity for your planned flight altitude (typically 30–100 m AGL). As you climb, ambient air cools the sensor housing, causing minor thermal drift. Set your automated NUC calibration interval to trigger every 30 to 60 seconds to keep your image crisp and uniform.
6. Industrial Deployment & Sourcing Best Practices
Rolling out modular 640×512 OEM thermal payloads opens up serious commercial capabilities without the enterprise price tag:
- ✅ Solar Farm Inspections: Scan utility-scale arrays at 50 meters AGL. A 12 μm 640×512 core easily spots failed bypass diodes, cracked cells, and string imbalances with sub-10 cm Ground Sample Distance.
- ✅ Substation & Powerline Audits: Detect high-resistance connections, failing transformers, and insulator breakdown on distribution lines without putting linemen in dangerous proximity.
- ✅ Wildfire Mapping & Forestry: Spot hidden root fires through thick smoke and track crop canopy water stress across large acreage.
- ✅ Search and Rescue (SAR) & Security: Rapidly locate missing persons, livestock, or trespassers in pitch darkness, thick brush, or light fog.
Sourcing & RFQ Best Practices for Engineering Teams
When sending out a Request for Quotation (RFQ) for OEM thermal cores, make sure your engineering spec covers these critical details:
- Optics Specification: State your target focal length, required field of view, and standoff distance (e.g., 9.1 mm for wide-area aerial scanning).
- Video Interface Protocol: Clearly define whether you need USB 2.0 digital output for companion computer processing or CVBS analog output for direct FPV transmission.
- Operating Environment: Confirm the required operating temperature range (the HR21-L612-USB handles -40°C to +85°C) and vibration resistance standards for your airframe.
- Compliance & Supply Chain: Check export control documentation, supply timelines, and NDAA compliance. For shipping logistics and regional support, check our global locations directory and browse our technical blog resources.
7. Frequently Asked Questions (FAQ)
Why are turnkey commercial thermal drones so expensive, and do sub-$500 budget drones work?
Is building a custom OEM thermal drone payload cheaper than buying turnkey enterprise platforms?
What technical specifications should I prioritize when choosing an OEM thermal module for a drone?
📚 References & Further Reading
- Industry Standard: Teledyne FLIR Boson Plus OEM Thermal Imaging Cores
- Vision Acceleration Framework: Khronos OpenVX Standard for Computer Vision Acceleration
- Related Engineering Guide: Uncooled LWIR Thermal Modules for Outdoor Security & Industrial Monitoring
- Corporate & Logistics Directory: Camcuda Global Supply & Regional Locations Registry
- Technical Knowledge Base: Camcuda Industrial Optoelectronics & Thermal Imaging Blog