Cheap Thermal Drone Guide: OEM 640 Core Selection vs Overpriced RTF Drones
Cheap Thermal Drone Architecture Guide: OEM 640 Core Selection vs. Overpriced RTF Platforms
Here’s the deal with the commercial drone market: tier-one enterprise manufacturers have spent the last decade pulling off a massive pricing hustle. They’ve convinced corporate procurement teams, police departments, and utility operators that if you want a reliable, high-resolution long-wave infrared (LWIR) camera in the air, you have to cut a check for $5,000 to $15,000. When you go hunting for a cheap thermal drone, the market tries to force you into a frustrating corner. You’re handed two bad choices: either empty your budget on a locked-down, proprietary Ready-to-Fly (RTF) platform, or buy a bargain-basement toy packing a 160×120 or 256×192 sensor that can’t resolve a hot connection on a power pole from thirty paces.
Look, if you build hardware and integrate sensors on the bench, you know the dirty secret of modern LWIR optics: the raw bill-of-materials (BOM) cost for uncooled vanadium oxide (VOx) microbolometer focal plane arrays has plummeted over the last five years. That eye-watering price tag on brand-name enterprise thermal birds isn’t coming from the physics of the silicon. It comes from closed-source gimbal licensing fees, encrypted proprietary downlinks, walled-garden ground stations, and massive enterprise markups. When you break free from those locked ecosystems and wire open-standard OEM thermal cores straight to modern flight stacks, you can build a rugged, field-grade 640×512 aerial platform at a tiny fraction of the turnkey sticker price.
This teardown guide cuts through the marketing noise. We’re breaking down the optical math, thermal dynamics, interface protocols, and integration steps you need to spec, bench-test, and deploy a high-performance 640-class thermal drone payload. By taking advantage of high-density uncooled VOx cores—like the CAMCUDA AeroMini and SuperMini lineups—you can nail top-tier Size, Weight, Power, and Cost (SWaP-C) efficiency without cutting corners on thermal sensitivity, refresh rate, or raw radiometric data collection.
Table of Contents
- 👉 1. The RTF Markup Trap: Turnkey vs. OEM Cost Analysis
- 👉 2. Thermal Resolution Physics: Why Sub-256 Sensors Fail in the Field
- 👉 3. SWaP-C Optimization for Low-Cost UAV Airframes
- 👉 4. Industrial Core Benchmark: CAMCUDA AeroMini vs. SuperMini 640
- 👉 5. Electrical Interface & Video Protocol Routing (USB vs. MIPI vs. Analog)
- 👉 6. Radiometric Temperature Measurement vs. Low-Latency Night Navigation
- 👉 7. Mechanical, Thermal, and Optical Integration Best Practices
- 👉 8. In-Depth Technical FAQ
1. The RTF Markup Trap: Turnkey vs. OEM Cost Analysis
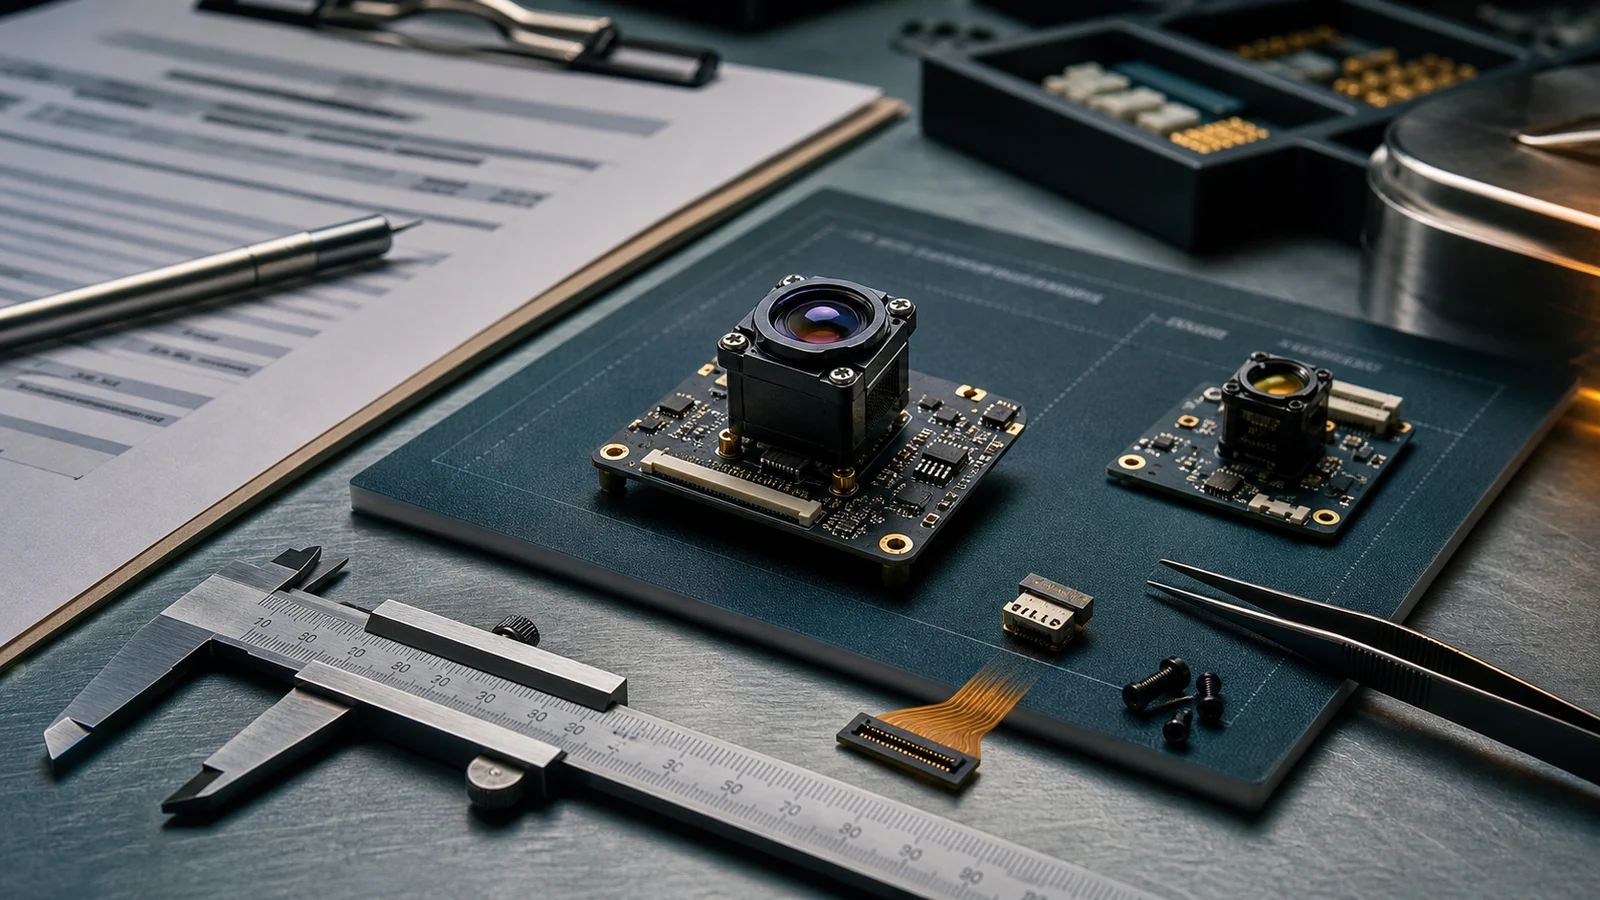
When fleet managers and lead engineers sit down to budget aerial thermal gear, default habit often points them toward off-the-shelf, turnkey enterprise rigs. Strip away the slick injection-molded plastic and run the real component math: the actual uncooled LWIR sensor core accounts for a measly 15% to 25% of the total system invoice. Where does the remaining 75% to 85% of your money go? It’s swallowed up by enterprise brand bloat, DRM-locked “smart” batteries with absurd replacement costs, proprietary video links, and forced annual software seat licenses.
In the shop and on real jobsites, banking your operational workflow on closed-architecture RTF platforms creates real engineering bottlenecks and financial leaks:
- ⚠️ Proprietary Ecosystem Trap: Big-box drone platforms run encrypted handshakes across their gimbal connections and bus lines. If an airframe gets retired or damaged, you can’t simply pull that expensive thermal core and mount it onto a secondary quad, a ruggedized ground rover (UGV), or a fixed-wing long-endurance mapper.
- ⚠️ Predatory Replacement Part Pricing: Clip a tree branch or take a hard bounce on landing, and you’ll find replacement factory camera assemblies or 3-axis gimbals priced at up to 60% of the entire original aircraft cost. That turns routine field maintenance into an absolute budget killer.
- ⚠️ Opaque Black-Box Data Pipelines: Turnkey enterprise birds chew up raw thermal data through heavy onboard H.264/H.265 compression before beaming it to an encrypted tablet app. That setup completely locks you out of raw 14-bit radiometric pixel streams or zero-latency BT.656 video frames required for edge AI vision, custom target classification, or custom flight computers.
Take the open OEM route instead. You source an industrial-grade 640×512 uncooled thermal core and hook it straight into open-source autopilots like PX4 or ArduPilot, run it through versatile companion compute boards (NVIDIA Jetson Orin Nano, Raspberry Pi CM4), and broadcast via standard open digital or analog transmitters. This modular approach wipes out thousands in corporate software tax and leaves you with complete ownership over your frame rates, radiometric conversion curves, and signal routing. Before you start ordering parts, make sure to read our field guide on critical thermal payload integration factors so you avoid common hardware procurement pitfalls.
2. Thermal Resolution Physics: Why Sub-256 Sensors Fail in the Field
Cheap thermal rigs frequently attempt to hit low price points by dropping in 160×120 (19,200 pixels) or 256×192 (49,152 pixels) microbolometers. While those low-res chips might look passably decent on a workbench test at two meters, the brutal physics of infrared optical sampling ensures they fall flat on their face the second you take off outdoors.
Out in the field, target resolution is ruled by the Johnson Criteria. This standard dictates the exact spatial frequency—measured in line pairs across the target’s critical dimension—required to hit mission success:
- ⚙️ Detection: Simply knowing an object is out there against background clutter (requires ~1.5 pixels across the critical dimension).
- ⚙️ Recognition: Figuring out what class of object you’re looking at, such as telling an elk from a lost hiker, or an SUV from a tractor (requires 6 to 8 pixels across the target).
- ⚙️ Identification: Nailing specific fine-grain details, like verifying if a suspect is holding a tool or a weapon, or identifying which exact solar cell in a string has a blown bypass diode (requires 12.8 to 16 pixels across the target).
How well your airborne camera resolves a target comes down to its Instantaneous Field of View (IFOV). That’s the angular slice of the world seen by a single physical pixel on the detector array. The equation is straightforward:
IFOV = p / f
Here, p represents the physical detector pixel pitch (in micrometers, μm) and f is the focal length of the germanium or chalcogenide lens (in millimeters, mm). The result comes out in milliradians (mrad). To figure out the ground footprint covered by a single pixel at a given standoff distance (altitude), use:
Target Spot Footprint = Standoff Distance (m) × IFOV (mrad)
Let’s look at an everyday industrial mission: inspecting a utility substation or 3-phase power line from a safe standoff distance of 50 meters, using typical medium-field optics:
- ⚠️ 160×120 Core (17 μm pitch, 4 mm lens): IFOV = 4.25 mrad. At 50 meters out, a single pixel covers a massive 21.25 cm × 21.25 cm patch of ground. A failing 50 mm electrical junction box takes up only a tiny sliver of that single pixel. The sensor averages the hotspot temperature with the cold background air behind it, under-reporting the true defect heat by dozens of degrees and missing the problem completely.
- ⚠️ 256×192 Core (12 μm pitch, 7 mm lens): IFOV = 1.71 mrad. At 50 meters, one pixel spans 8.55 cm. That spot size ratio is still far too coarse to reliably catch early-stage insulation bridging or small electrical disconnect faults without buzzing dangerously close to energized high-voltage equipment.
- ✅ 640×512 Core (8 μm pitch, 8.7 mm lens): IFOV = 0.92 mrad. At 50 meters, one pixel covers just 4.6 cm. That small hotspot now lights up multiple distinct pixels on the array. You get crisp structural detail, accurate radiometry, and positive target identification while staying safely out of the prop-wash danger zone.
A true 640×512 sensor matrix gives you 327,680 individual temperature measurement points every single frame. That’s 17 times more spatial data than a 160-class core and 6.6 times more data than a 256 array. If your operations touch utility inspection, structural audits, search-and-rescue, or perimeter security, 640 resolution is the baseline entry point for reliable aerial thermography.
3. SWaP-C Optimization for Low-Cost UAV Airframes
When you’re building unmanned airborne platforms, Size, Weight, Power, and Cost (SWaP-C) run the whole show. Drones operate under strict mass budgets; every single extra gram you hang on the airframe taxes the brushless motors, pulls more continuous amps from your LiPo or Li-ion pack, and chops down your airtime.
Back in the day, mounting a 640×512 thermal camera meant bolting on a heavy, brick-like aluminum housing weighing anywhere from 80 to 150 grams. On top of that, you had to add bulky heatsinks and power-hungry processing boards pulling 2 to 4 Watts. Hanging that kind of deadweight on a standard 5-inch or 7-inch drone frame destroyed hover efficiency, shifted the center of gravity, and burned out small direct-drive gimbal motors under continuous angular strain.
Modern micro-LWIR engineering completely changed the game through two big hardware advances:
- ⚙️ Sub-Micron Pixel Lithography: Stepping down from legacy 17 μm pixels to modern 12 μm and ultra-dense 8 μm VOx arrays drastically shrinks the physical silicon footprint. An 8 μm 640 detector needs much smaller optical lens elements to hit the exact same field of view, radically reducing germanium glass mass and assembly weight.
- ⚙️ Sub-0.5W Ultra-Low Power Readout ASICs: Advanced readout integrated circuits (ROIC) now handle dynamic range tuning, non-uniformity correction (NUC), and digital bus outputs right on ultra-efficient silicon. Pulling ≤0.5 Watts under typical loads, these cores generate practically zero parasitic heat. That lets you scrap heavy active cooling fans and oversized heatsinks, dropping bare-core weight down below 3.5 grams.
That leap in SWaP-C engineering means you can now drop a full-resolution 640 thermal package onto ultralight sub-250g micro-drones, agile tactical FPV setups, or budget scouting fixed-wings without sacrificing battery life or flight control responsiveness.
4. Industrial Core Benchmark: CAMCUDA AeroMini vs. SuperMini 640
Selecting the right core comes down to matching your mechanical envelope, interface bus, and optical requirements. Below is a detailed bench-level hardware comparison of two high-performance uncooled VOx cores engineered by CAMCUDA for UAV builds: the flexible AeroMini 640 and the ultra-light SuperMini 640 / 640T.
CAMCUDA AeroMini 640 — High-Speed Versatile UAV Thermal Camera Core
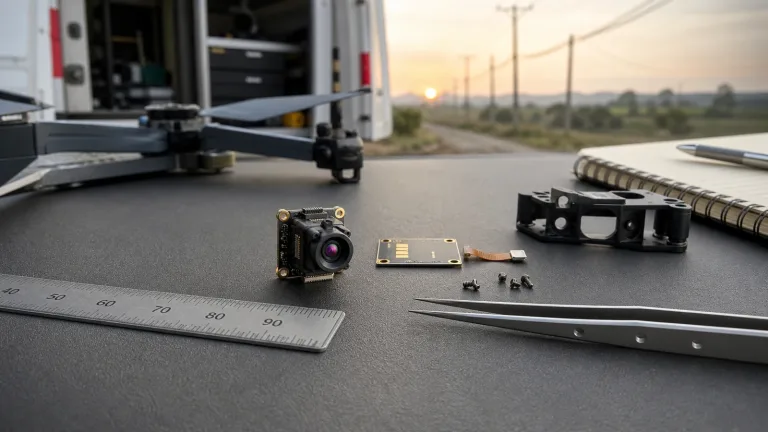
The CAMCUDA AeroMini 640 is a workhorse uncooled LWIR core purpose-built for drone payloads, commercial integration, and custom 2-axis or 3-axis stabilized gimbals. Built on a proven 12 μm pixel pitch 640×512 VOx detector, the AeroMini operates across the standard 8–14 μm spectral window and delivers clean thermal sensitivity with a standard Noise Equivalent Temperature Difference (NETD) of ≤50 mK at 25°C (F/1.0), with an optional factory-tuned ≤40 mK high-sensitivity build available for critical applications.
Tipping the scales at under 20 grams bare (without lens and flange) with tight 21 × 21 × 28 mm case dimensions, the AeroMini delivers rock-solid structural rigidity. It ships standard with a high-speed 60 Hz non-radiometric output (with a 30 Hz factory ordering option) for buttery-smooth, zero-lag night piloting and rapid search passes. When your mission calls for hard numbers, you can order the calibrated 25 Hz radiometric build, which measures absolute surface temps from −20°C up to +550°C.
On the wiring side, the AeroMini gives you unmatched versatility with native support for USB, YUV, BT.656, and composite analog video (CVBS, PAL/NTSC), plus UART, RS232, and RS422 control channels. Typical power draw stays down under 0.5 W on a 5V rail. It supports a comprehensive lineup of interchangeable athermal lenses from 4 mm (100° × 82° FOV) up to 50 mm (9.0° × 7.2° FOV), covering everything from broad terrain awareness to extreme-distance identification.
| AeroMini Parameter | Technical Specification | Integration Notes |
|---|---|---|
| Thermal Resolution | 640 × 512 pixels | VOx Uncooled FPA detector |
| Pixel Pitch & Spectral Range | 12 μm | 8–14 μm (LWIR) | High optical transmission across 8–14 μm |
| Thermal Sensitivity (NETD) | ≤50 mK @ 25°C, F/1.0 (≤40 mK optional) | Factory calibrated at F1.0 aperture |
| Frame Rates | 60 Hz default / 30 Hz option (25 Hz Radiometric) | Non-radiometric default: 60 Hz for low latency |
| Dimensions & Mass (Bare Core) | 21 × 21 × 28 mm | <20 grams | Excludes objective lens and mounting flange |
| Supply Voltage & Power | 5 V (or 12 V board-dependent) | <0.5 W typical | POWER_IN1/2 pins are strictly 5V inputs |
| Digital & Analog Video | USB, YUV, BT.656 | CVBS (PAL / NTSC) | Interface board and firmware dependent |
| Radiometric Range | −20°C to +550°C | Applies to 25 Hz radiometric version only |
| Available Lens Options | 4mm (100°×82°), 7mm (64°×52°), 9mm (48.7°×38.6°), 13mm (31.9°×25.7°), 15mm, 18mm (24.2°×19.5°), 25mm (17.5°×14°), 35mm (12.5°×10°), 50mm (9°×7.2°) | 9mm, 13mm, and 18mm available for radiometric variant |
| Operating / Storage Temp | −40°C to +80°C | −50°C to +85°C | Humidity: 5–95% non-condensing |
View Product Details & Pricing ➔
CAMCUDA SuperMini 640 / 640T — Ultra-Light 8μm Micro LWIR Module
The CAMCUDA SuperMini 640 / 640T is in a class of its own when it comes to ultra-low SWaP thermal integration. Built for space-critical builds, micro-gimbals, sub-250g frames, and tactical FPV builds, this module packs an advanced 8 μm pixel pitch VOx detector array into a microscopic 13 × 13 mm footprint. The bare core weighs less than 3.5 grams and draws ≤0.5 Watts under typical operation.
The SuperMini lineup is split into two specialized hardware versions:
- ✅ CAMCUDA SuperMini 640 (Imaging Only): Runs at a fast 50 Hz refresh rate. Optimized strictly for thermal imaging and night vision, it outputs low-latency 8-bit LVCMOS / BT.656 and 2-lane MIPI CSI-2 streams straight to companion computers or digital video gear.
- ✅ CAMCUDA SuperMini 640T (Thermographic): Operates at 30 Hz and delivers true per-pixel radiometric temperature measurements across two calibrated bands: −20°C to +150°C and +100°C to +650°C. It outputs complete CDS3 and MIPI data streams designed for automated industrial surveys and mapping.
Physical interfacing is handled via a miniature Hirose DF40C-30DP-0.4V(51) 30-pin board-to-board connector, exposing 2-lane MIPI, BT.656 / LVCMOS, 1.8V logic UART control, USB 2.0, and an optional CVBS analog pin (which pairs with an external video-buffer IC). For quick breadboard testing, an optional factory breakout board (TMS6102V100F022) adapts everything down to a simple 4-pin USB connection. You can pair the core with four dedicated F1.0 athermal lenses, ranging from an ultra-wide 3.7 mm (90.0° × 68.2° FOV, 2.16 mrad IFOV) up to a narrow 11 mm (24.9° × 20.0° FOV, 0.73 mrad IFOV).
| SuperMini Parameter | Technical Specification | Integration Notes |
|---|---|---|
| Thermal Resolution | 640 × 512 pixels | VOx uncooled focal plane array |
| Pixel Pitch & Spectral Range | 8 μm | 8–14 μm (LWIR) | Ultra-high density optical packaging |
| Thermal Sensitivity (NETD) | ≤40 mK @ 25°C, F1.0 | Exceptional thermal contrast resolution |
| Frame Rates by Variant | 640 (Imaging): 50 Hz | 640T (Radiometric): 30 Hz | Model must be confirmed before integration |
| Dimensions & Mass (Bare Core) | 13 × 13 × 13.4 mm | <3.5 grams | World-class low-SWaP form factor |
| Power Rails & Noise Limits | MAIN_POWER: 3.8–5.2V (≤10mV p-p) +3.3V: 3.28–3.32V (≤10mV p-p) +1.8V: 1.78–1.82V (≤1mV RMS) |
Typical total consumption ≤0.5 W; clean power required |
| Hardware Electrical Interface | Hirose DF40C-30DP-0.4V(51) 30-Pin Connector | MIPI and BT.656 cannot be used simultaneously |
| Thermographic Measurement | −20°C to +150°C and +100°C to +650°C | Applies strictly to SuperMini 640T variant |
| Athermal Lens Options (F1.0) | 3.7mm (90.0°×68.2°, 2.16 mrad) 6.1mm (46.6°×37.6°, 1.31 mrad) 8.7mm (40.0°×32.2°, 0.92 mrad) 11.0mm (24.9°×20.0°, 0.73 mrad) |
All configurations maintain F1.0 optical aperture |
| Expansion Board Option | TMS6102V100F022 (4-Pin USB Interface) | Provides rapid plug-and-play USB connection |
View Product Details & Pricing ➔
5. Electrical Interface & Video Protocol Routing (USB vs. MIPI vs. Analog)
When you’re wiring up an open-architecture thermal payload, your choice of video bus and telemetry protocol makes or breaks the system. The right interface gives you low latency, protects full radiometric bit depth, and prevents your onboard companion computer from choking on CPU load. Here is how the four main video routing strategies stack up on the bench:
1. MIPI CSI-2 (Mobile Industry Processor Interface)
In our shop, MIPI CSI-2 is the top choice for tight hardware integration with modern embedded processors (NVIDIA Jetson Orin Nano, Raspberry Pi CM4, NXP i.MX8). The CAMCUDA SuperMini 640 routes 2-lane MIPI directly off its 30-pin Hirose connector. This pipeline drops uncompressed 14-bit or 16-bit raw radiometric frames straight into host system memory via Direct Memory Access (DMA) and the onboard hardware ISP. You get near-instant frame delivery (<10 ms pipeline delay) with negligible host CPU usage, giving you a clean pipe for real-time onboard computer vision, edge AI detection, and automated target tracking.
2. USB 2.0 (UVC – USB Video Class)
USB 2.0 UVC is the fastest route to get images on a screen. Because it talks standard UVC drivers native to Linux (V4L2), ROS, Windows, and Android, the thermal core enumerates just like an ordinary webcam. When you use a dedicated USB breakout (such as the AeroMini USB board or the SuperMini TMS6102V100F022 expansion board), you can stream processed 8-bit YUV video or capture raw radiometric frames over a simple 4-wire connection. It’s the most practical route if your companion computer is already balancing multiple external USB peripherals.
3. BT.656 / Digital LVCMOS
BT.656 is a rock-solid, parallel digital video standard that streams 8-bit data alongside embedded timing flags (SAV/EAV codes). It is widely supported across FPGAs, custom digital video links, and dedicated hardware video encoders. Because it dumps uncompressed digital frames without USB protocol handshaking overhead, BT.656 remains a favorite for ruggedized tactical data links and mission-critical hardware.
4. Baseband Analog CVBS (PAL / NTSC)
If you’re building tactical FPV rigs, quick-deployment search spotters, or ultra-budget scout drones, don’t overlook analog composite video (CVBS). The AeroMini 640 pushes native analog CVBS, which wires directly into standard 5.8 GHz video transmitters (VTX). This configuration completely bypasses companion computers and digital compression codecs, beaming a zero-latency (<5 ms) thermal image straight into the pilot’s goggles at the lowest possible cost and complexity.
To avoid ugly signal degradation and frame drops, keep your high-speed MIPI and parallel video traces clean by following routing guidelines set by the Japan Industrial Imaging Association, especially when laying lines near noisy brushless motor power feeds.
6. Radiometric Temperature Measurement vs. Low-Latency Night Navigation
One of the most frequent integration mistakes we see engineers make is mixing up non-radiometric (imaging-only) and radiometric (temperature-measuring) sensors. Grabbing the wrong architecture means you either burn budget on calibration overhead you won’t use, or end up with a payload that can’t provide actionable numbers during an industrial audit.
Non-Radiometric Cores: Built for Contrast, Speed, and Pilot Awareness
In non-radiometric modules (like the CAMCUDA AeroMini at 60 Hz or SuperMini 640 at 50 Hz), internal processing focuses entirely on image clarity. The onboard ASIC runs adaptive contrast algorithms—such as Dynamic Contrast Enhancement (DCE) and Adaptive Gain Control (AGC)—to remap the raw sensor data into an optimized 8-bit visual stream (256 shades of gray or color steps) tuned for human eyes and high edge contrast.
Because the core doesn’t need to crunch real-time blackbody calibration equations or look up per-pixel temperature tables, it pushes video out at high refresh rates (50 Hz to 60 Hz) with practically zero latency. These cores are the sweet spot for:
- ✅ Night piloting, tactical maneuvering, and obstacle avoidance.
- ✅ Search and rescue (SAR) sweeps where detecting human heat contrast is the only metric that matters.
- ✅ Perimeter patrols, security surveillance, and livestock tracking.
If your build focuses on automated tracking and target following, pairing a fast non-radiometric core with an integrated EO/IR AI tracking camera module handles target locking and gimbal stabilization right at the hardware edge without bogging down your flight computer.
Radiometric Cores: Quantitative Industrial Thermography
Radiometric cores (like the CAMCUDA SuperMini 640T and the AeroMini Radiometric variant) spend serious time on factory calibration rigs, mapped against certified blackbody reference cavities across their entire operational temperature envelope. Every single pixel on that 640×512 array acts as an independent, calibrated thermometer, outputting 14-bit or 16-bit raw digital values.
Your companion software uses embedded calibration constants to convert those raw Digital Numbers (DN) into absolute temperature measurements (°C, °F, or Kelvin) using the core conversion formula:
T_pixel = (Digital_Number × Scale_Factor) ± Calibration_Offset
Because the system processes 327,680 individual thermographic data points on every cycle, radiometric variants typically operate at 25 Hz to 30 Hz to keep compute bandwidth within realistic thermal limits. You need a radiometric core for:
- ✅ Utility-scale solar farm thermography and automated cell fault grading.
- ✅ High-voltage substation, transformer, and distribution line inspections.
- ✅ Building envelope thermal loss mapping and flat-roof moisture detection.
- ✅ Oil and gas pipeline anomaly detection and industrial tank level monitoring.
7. Mechanical, Thermal, and Optical Integration Best Practices
Dropping an uncooled LWIR core onto a vibrating drone airframe requires proper handling of electrical noise, thermal equilibrium, and lens math.
1. Clean Power Rails and Noise Suppression
Uncooled microbolometer arrays are sensitive analog devices. Electronic Speed Controllers (ESCs) and high-KV brushless motors inject significant high-frequency switching noise straight into the main battery rail. If that noise bleeds into your thermal core’s internal bias circuits, you’ll see horizontal banding artifacts, fixed pattern noise (FPN), or frame tearing across your feed.
- ⚙️ Dedicated Low-Dropout Regulators (LDO): Never tap your thermal core straight into a generic flight controller BEC or the main battery lead. Always use a dedicated, low-noise LDO regulator with high Power Supply Rejection Ratio (PSRR).
- ⚙️ Strict Ripple Budgets: Keep electrical ripple on the main 5V rail below 10 mV peak-to-peak. For sensitive 1.8V digital logic rails, keep high-frequency noise under 1 mV RMS across the 1 Hz to 50 kHz band.
- ⚙️ Star Grounding: Terminate sensor grounds, video grounds, and logic grounds back to a single common point on your power distribution board to kill ground loops before they start.
2. Heat Sinking and Flat-Field Correction (FFC) Management
Even though uncooled VOx cores don’t need cryogenic cooling engines, the microbolometer pixels themselves detect minute temperature variations. Sudden thermal shifts—like pulling a drone out of an air-conditioned truck into summer heat, or flying through turbulent prop-wash—create uneven temperature gradients across the aluminum camera casing. When this happens, the core is forced to drop its internal shutter for Flat-Field Correction (FFC), freezing your video feed for a split second.
- ⚙️ Solid Thermal Conduction: Link the core’s aluminum housing directly to your gimbal plate or carbon fiber frame using a high-performance thermal pad with a rating of ≥3.0 W/m·K.
- ⚙️ Ventilate Your Housings: Never seal a bare thermal core inside a tight 3D-printed enclosure alongside companion processors without dedicated airflow. Trapped ambient heat degrades your NETD sensitivity and forces constant FFC shutter clicks.
3. Optical Selection and Standoff Planning
Picking your lens focal length comes down to balancing your needed Field of View (FOV) against safe flying altitudes:
- ⚙️ Wide-Angle Lenses (3.7 mm to 6.1 mm): Deliver broad horizontal coverage (46° to 90° H-FOV). Best suited for low-altitude close-quarters flights, indoor inspections, and primary pilot navigation where wide peripheral awareness is critical.
- ⚙️ Standard Mid-Range Lenses (8.7 mm to 13 mm): Offer a balanced perspective (31° to 48° H-FOV). Ideal for solar farm mapping, utility grid scouting, and SAR search patterns flown between 30 and 60 meters Above Ground Level (AGL).
- ⚙️ Telephoto Long-Range Lenses (18 mm to 50 mm): Deliver tight angular focus (9° to 24° H-FOV). Engineered for high-altitude utility audits, perimeter security, and tactical surveillance where your drone needs to stay 100 to 300 meters away while resolving small thermal signatures.
For automated industrial missions, hooking up an onboard UAV AI tracking module lets your system spot, lock, and track targets autonomously without pilot input. For the latest payload standards and field compliance updates, keep an eye on technical reporting from Commercial UAV News.
8. In-Depth Technical FAQ
Why are turnkey enterprise thermal drones so expensive compared to custom OEM payload integration?
Can I build a genuinely cheap thermal drone without sacrificing 640×512 resolution or frame rate?
What is the primary technical difference between the CAMCUDA AeroMini 640 and SuperMini 640?
How do I choose between an imaging-only core and a radiometric core for my UAV payload?
📚 References & Further Reading
- Industry Standard: Japan Industrial Imaging Association (JIIA) Machine Vision Standards
- Industry Analysis: Commercial UAV News — Airborne Sensor Integration
- Related Guide: Critical Payload Questions Before Buying a Thermal Drone
- AI Tracking Architecture: Onboard UAV AI Tracking Module Engineering Guide
- Integrated Payloads: CAMCUDA Dual EO/IR AI Tracking Payload Series